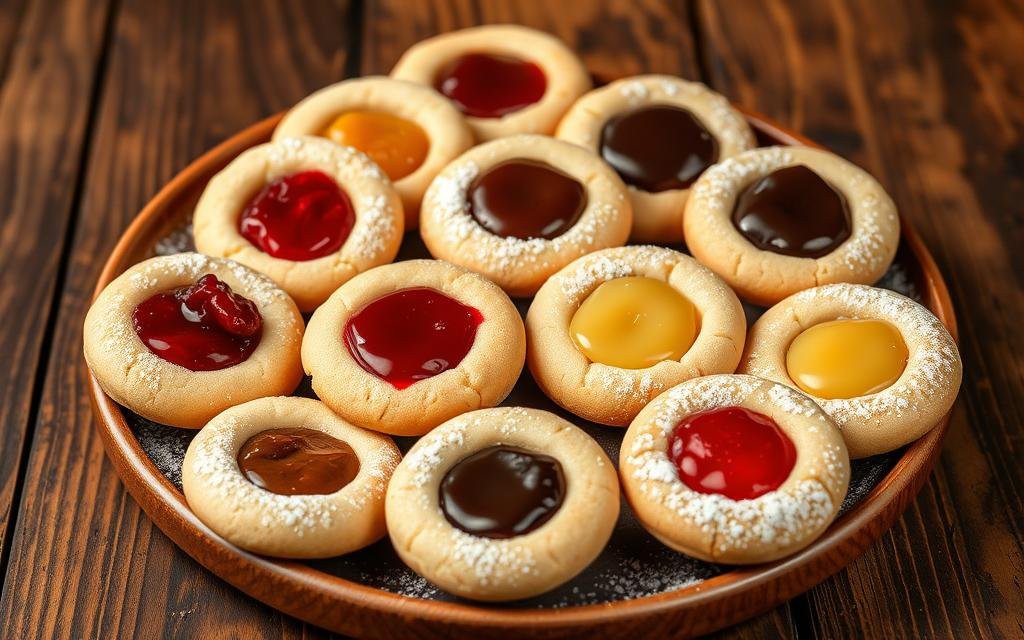
Thumbprint Cookies: Buttery, Baked Perfection
- Desserts
- December 30, 2024
- No Comment
- 483

These cookies are more than just a mix of ingredients. They celebrate the joy of baking, a simple yet beautiful dessert that captures the holiday spirit. From the first press of your thumb to the burst of jam inside, they show the happiness of baking at home.
Thumbprint cookies are perfect for both experienced and new bakers. They’re easy to make, delicious, and versatile. This makes them a great choice for anyone looking to bake something special.
Key Takeaways
- Thumbprint cookies are a beloved holiday baking tradition
- The recipe is simple and requires minimal ingredients
- Cookies can be customized with various jam fillings
- Perfect for family gatherings and cookie exchanges
- No special baking skills required to create delicious results
The Classic Appeal of Thumbprint Cookies
Thumbprint cookies are a cherished tradition in holiday desserts. They have won the hearts of many for years. They bring families together in the kitchen, creating lasting memories.
History of Traditional Cookie Making
Thumbprint cookies started in Pittsburgh, Pennsylvania. Kaufmann’s Department Store helped make them famous, offering 70 different kinds. These cookies became more than just a snack; they became a cultural icon.
“Baking is love made edible” – Anonymous Baker
- Originated in Pittsburgh, Pennsylvania
- Kaufmann’s Department Store featured 70 unique variations
- Flavors included strawberry, caramel, and cinnamon
Why These Cookies Are Holiday Favorites
These cookies are essential for holiday baking. They offer endless filling options, making them unique. With a simple thumbprint, you can make a special dessert for family gatherings.
| Cookie Characteristic | Details |
|---|---|
| Yield | 24 cookies (2 dozen) |
| Calories per Cookie | 157 calories |
| Recommended Fillings | Raspberry, Strawberry, Peach |
Thumbprint cookies are special because of their simplicity and the memories they make. Each bite shares a story of family traditions and festive celebrations.
Essential Ingredients for Perfect Thumbprint Cookies
Making delicious thumbprint cookies begins with choosing the right ingredients. Your baking essentials turn simple items into tasty treats that everyone will enjoy. Knowing the importance of each ingredient is key to getting great results.
The base of these tasty cookies comes from a mix of ingredients. Let’s look at the main parts that make thumbprint cookies so appealing:
- All-purpose flour (1¼ cups)
- Unsalted butter (½ cup, room temperature)
- Brown sugar (½ cup)
- Vanilla extract
- Salt
- Eggs
“The secret to perfect thumbprint cookies is using the freshest, highest-quality ingredients possible.” – Professional Baker
When picking your baking essentials, focus on quality. Ingredients at room temperature mix better, making the dough more even.
| Ingredient | Quantity | Purpose |
|---|---|---|
| Unsalted Butter | ½ cup | Creates rich, tender texture |
| Brown Sugar | ½ cup | Adds depth of flavor |
| All-Purpose Flour | 1¼ cups | Provides structure |
Pro tip: Use fresh, high-quality jam for filling. Raspberry and apricot are classic choices that complement the buttery cookie base perfectly.
Your cookie ingredients are the start of a memorable baking journey. With the right selection and preparation, you’ll make thumbprint cookies that will wow family and friends.
Kitchen Tools and Equipment Needed
To make delicious thumbprint cookies, you need the right tools. Your kitchen essentials will make the process smooth and fun. Let’s look at the must-have tools for a great baking experience.
Creating these classic cookies needs precision and the right tools. Both professional bakers and home cooks know that good equipment makes a difference.
Mixing Equipment Essentials
Your baking tools should include:
- Stand mixer with paddle attachment
- Large mixing bowls
- Measuring cups and spoons
- Kitchen scale for precise measurements
- Wooden spoon
“The right tools can turn simple ingredients into culinary magic!” – Baking Enthusiast
Baking Tools and Accessories
To make perfect thumbprint cookies, you’ll need these tools:
- Rimmed baking sheets
- Parchment paper
- Silicone baking mats
- Wire cooling rack
- Optional: Cookie scoop for uniform sizing
A wooden spoon handle or your thumb is great for making those cookie indentations. Professional bakers suggest using a small measuring spoon or the back of a rounded teaspoon for neat impressions.
Quality cookie-making equipment makes your thumbprint cookies look and taste professional. Remember, precision is key in baking!
Step-by-Step Preparation Guide
Making the perfect homemade cookies needs careful prep and detail. Your cookie recipe will come to life with these precise baking instructions. They turn simple ingredients into delightful thumbprint treats.
Before starting, gather all your ingredients and check their temperature. Room temperature butter and eggs are key for the best cookie texture.
- Prepare your ingredients:
- 113 grams unsalted butter
- 50 grams granulated sugar
- 1 egg yolk
- 125 grams all-purpose flour
- 1/8 teaspoon salt
- Cream butter and sugar until light and fluffy
- Add egg yolk and vanilla extract
- Gradually mix in dry ingredients
Your homemade cookies need chilling time. Pro tip: Refrigerate the dough for 30 minutes to help maintain the cookie’s shape during baking.
“The secret to perfect cookies is patience and precision in preparation.” – Baking Expert
After chilling, roll the dough into small 15-gram balls. You should get about 20 cookie balls. Make a gentle indentation in each ball with your thumb or the back of a small spoon.
- Preheat oven to 350°F (180°C)
- Line baking sheets with parchment paper
- Space cookies 2 inches apart
- Fill thumbprints with 1/4 cup raspberry jam
Your carefully crafted cookie recipe is now ready for baking. The total baking time is 12-15 minutes. This makes golden-edged cookies that look great and taste amazing.
Making the Perfect Cookie Dough Base
Creating the ultimate thumbprint cookie starts with mastering your cookie dough techniques. The key to delicious thumbprint cookies is a rich, tender base. This base will hold your favorite jam perfectly.
When it comes to cookie dough tips, temperature and mixing are key. Your butter should be soft but not melted. Think room temperature and slightly pliable. This ensures smooth incorporation and helps create that perfect cookie texture home bakers dream about.
Butter Temperature Secrets
Achieving the right butter consistency is a game-changer in baking techniques. Follow these guidelines:
- Let butter sit at room temperature for 30-45 minutes
- Butter should be soft enough to press with a finger
- Avoid melting – this affects cookie structure
Precise Mixing Techniques
Mixing your dough requires a delicate touch. Cream butter and sugars until light and fluffy, which typically takes about 3-4 minutes. This process incorporates air and creates a smoother texture.
“The secret to great cookies is in the details of preparation.” – Professional Baker’s Wisdom
| Ingredient | Quantity | Purpose |
|---|---|---|
| Butter | 1 cup | Creates richness and tender crumb |
| Granulated Sugar | 1/3 cup | Provides sweetness and helps with caramelization |
| Brown Sugar | 1/3 cup | Adds moisture and depth of flavor |
Pro tip: Always chill your cookie dough for 45 minutes before baking. This prevents excessive spreading and helps maintain the cookies’ shape. Your patience will be rewarded with perfectly textured thumbprint cookies that look as good as they taste!
Creating the Signature Thumbprint

Mastering the cookie shaping technique is key to perfect thumbprint cookies. The art of making these treats is in the precise method of forming the signature indentation. This gives the cookies their unique character.
To start your cookie design journey, follow these essential steps:
- Start with room temperature dough
- Roll the dough into uniform 1-inch balls
- Use your thumb or the back of a wooden spoon to create a deep well
“The perfect thumbprint is about precision and gentle pressure”
When crafting your thumbprint cookies, consider these professional tips for optimal results:
- Ensure dough is chilled for at least an hour before shaping
- Create an indentation about 3/8 to 1/2 inch deep
- Avoid pressing too hard to prevent cookie cracking
| Technique | Key Considerations |
|---|---|
| Ball Size | Approximately 1 inch in diameter |
| Indentation Depth | 3/8 to 1/2 inch |
| Jam Filling | ½ teaspoon to prevent overflow |
The thumbprint technique requires a delicate touch. Practice makes perfect when it comes to creating those beautiful, consistent cookie wells. These will cradle your favorite jam or filling.
Pro tip: If the dough becomes too warm while shaping, refrigerate it for a few minutes. This will help maintain the ideal consistency for cookie shaping.
Best Jam Varieties and Filling Options
Thumbprint cookies become special with the right fillings. The key is picking fruit jams that match the shortbread base.
Choosing the right jam is key for unforgettable flavors. Let’s look at some top picks that make thumbprint cookies stand out.
Traditional Jam Choices
Classic fruit jams are favorites for many. Here are some beloved options:
- Black raspberry jam
- Peach preserves
- Wild Maine blueberry jam
- Intense cherry jam
Creative Filling Alternatives
For those who like to try new things, here are some unique options:
- Tangerine marmalade
- Lemon curd
- Fig jam
- Homemade mulled cranberry jelly
“The secret to outstanding thumbprint cookies is finding that perfect balance between the buttery cookie and the vibrant jam filling.”
Pro tip: Look for brands like Bon Maman and Stonewall Kitchen for great jam flavors. Choose thick, high-quality preserves that stay firm during baking.
| Jam Type | Flavor Profile | Best Pairing |
|---|---|---|
| Black Raspberry | Rich, intense | Classic shortbread |
| Lemon Curd | Tangy, bright | Butter cookies |
| Fig Jam | Sweet, complex | Nutty cookie bases |
Remember, the jam filling isn’t baked inside the cookie. This keeps its flavor bright and fresh. It makes your thumbprint cookies taste as good as they look!
Baking Temperature and Timing Secrets
Getting the perfect thumbprint cookies needs precision and care. Your oven’s temperature is key to making those treats golden and soft. Everyone loves them.
Thumbprint cookies usually bake for 10-15 minutes. Experts say to keep your oven at 350°F (175°C) for the best results.
“The secret to perfect thumbprint cookies is watching them like a hawk during those critical baking minutes!” – Pastry Chef Sarah Miller
- Preheat your oven to exactly 350°F
- Use an oven thermometer for accuracy
- Check cookies at the 10-minute mark
- Look for light golden edges as a doneness indicator
Different ovens can have slightly different temperatures. So, always keep a close eye on your cookies. You want a cookie that’s crispy on the outside and soft on the inside.
Pro tip: If your oven runs hot, try baking at 325°F for 2-3 minutes longer. This stops over-browning and ensures even baking.
Remember: Patience and precision are your best tools in cookie baking!
Decorating and Finishing Touches
Turning your thumbprint cookies into stunning works of art is all about creative decorating. The right presentation can make your baking look like it was done by a pro.

Powdered sugar is a timeless choice for adding a touch of elegance. Its delicate white dusting contrasts beautifully with the cookies, making them hard to resist.
Powdered Sugar Dusting Methods
Experts suggest a few ways to apply powdered sugar:
- Use a fine mesh sifter for even distribution
- Dust cookies when completely cooled
- Apply sugar just before serving to maintain crisp appearance
Professional Presentation Ideas
Here are some ways to make your presentation stand out:
- Drizzle melted white chocolate in zigzag patterns
- Incorporate colorful sprinkles for a festive touch
- Create themed decorations for holidays
| Decoration Technique | Difficulty Level | Visual Impact |
|---|---|---|
| Powdered Sugar Dusting | Easy | Classic Elegance |
| Chocolate Drizzle | Medium | Gourmet Appeal |
| Themed Sprinkles | Easy | Festive Charm |
“The art of cookie decorating is about expressing creativity through sweet details.” – Professional Baker
Your presentation can turn simple thumbprint cookies into unforgettable treats. Try out different decorating techniques to find your own style.
Storage and Freshness Tips
Keeping your homemade thumbprint cookies fresh is key. They deserve the right care to stay tasty and soft. Smart storage is essential.
Optimal Storage Methods
Storing your thumbprint cookies right is vital. Here are some tips to keep them fresh:
- Use an airtight container with a secure lid
- Layer cookies between parchment paper to prevent sticking
- Store at room temperature for up to 10 days
- Keep away from direct sunlight and heat sources
Long-Term Preservation Techniques
Want to enjoy your cookies for longer? Try these methods:
| Storage Method | Duration | Recommended For |
|---|---|---|
| Room Temperature | Up to 10 days | Fresh, unadorned cookies |
| Refrigerator | Up to 2 weeks | Cookies with cream-based fillings |
| Freezer | Up to 3 months | Long-term storage |
Pro tip: Wrap cookies in plastic wrap before freezing. This prevents freezer burn and keeps them soft.
“The secret to great cookies is not just in the baking, but in the careful storage.” – Pastry Chef Wisdom
Freezing Tips
Freezing is a great way to keep your cookies fresh. Here’s how to do it right:
- Cool cookies completely before freezing
- Separate layers with parchment paper
- Use a rigid container to prevent crushing
- Label with the date of freezing
- Thaw at room temperature for best texture
By following these tips, your thumbprint cookies will stay delicious. Enjoy your treats!
Common Baking Troubleshooting
Baking problems can ruin your favorite thumbprint cookies. Knowing how to fix these issues can make your cookies perfect every time. Let’s look at the most common solutions to save your baking.
Thumbprint cookies can be tricky, but with the right knowledge, you can overcome most baking challenges. Here are the key issues bakers frequently encounter:
Preventing Cookie Spread
Cookie spread is a common problem for home bakers. Several factors contribute to this issue:
- Butter temperature: Ensure butter is cool, not melted
- Chill the dough for at least 30 minutes before baking
- Use the correct flour-to-fat ratio
- Check your oven temperature with a reliable thermometer
Fixing Filling Issues
Jam and filling can make or break your thumbprint cookies. Here are some baking solutions for common filling problems:
| Problem | Solution |
|---|---|
| Runny Jam | Use thick preserves or reduce liquid content |
| Filling Leaking | Create deeper thumbprint indentations |
| Burnt Filling | Add filling during last 5 minutes of baking |
“Perfect cookies are about precision and patience” – Professional Baker’s Secret
Remember, practice makes perfect. Each baking challenge is an opportunity to improve your skills and create delicious thumbprint cookies that everyone will love.
Conclusion
Thumbprint cookies are more than a tasty treat. They connect us to family traditions and holiday baking. These cookies have a rich history, starting in Sweden, and have become a favorite in American kitchens.
Don’t stop at the classic recipe. Try new fillings like strawberry jam, lemon curd, or caramel sauce. This makes each batch special, perfect for any occasion.
These cookies are great for both experienced and new bakers. They’re easy to make, needing just 45 minutes and simple ingredients. They bring happiness to those who taste them. Let your baking skills grow with each batch of thumbprint cookies.
The best recipes are made with love and shared with others. So, get your ingredients ready, preheat your oven, and start making memories with every cookie.
FAQ
How long do thumbprint cookies stay fresh?
Thumbprint cookies stay fresh for up to 3 days. Store them in an airtight container at room temperature. For longer storage, refrigerate or freeze them, wrapping them well to avoid freezer burn.
Can I use different types of jam in my thumbprint cookies?
Yes! You can use seedless strawberry, raspberry, and grape jams, or try other fruit preserves. Some people even use chocolate or caramel for a unique taste.
What’s the best way to prevent cookies from spreading during baking?
Chill your dough well before baking to stop cookies from spreading. The dough’s temperature and consistency are key to keeping the cookies’ shape.
Can children help make thumbprint cookies?
Thumbprint cookies are great for family baking! Kids can roll the dough into balls and make the thumbprint. It’s a fun holiday tradition.
What temperature should I bake thumbprint cookies?
Bake at 350°F (175°C) for 10-12 minutes. For softer cookies, try 325°F (165°C) for 12-15 minutes. Always watch them to avoid over-baking.
Can I make these cookies ahead of time?
Yes, you can make the dough ahead. Refrigerate it for a few days or freeze for weeks. Thaw the dough when you’re ready to bake and fill the cookies.
Are thumbprint cookies suitable for people with nut allergies?
Traditional recipes have chopped pecans, but you can make them nut-free. Use graham cracker crumbs or coconut instead for those with allergies.
How do I get a perfect thumbprint indentation?
Use a wooden spoon handle or your thumb to make a 3/8 to 1/2 inch deep indentation. Be gentle to avoid dough cracks. Make the well just before adding jam.
Can I use different types of sugar in the recipe?
The recipe uses granulated and confectioner’s sugar. You can try brown sugar, but stick to the recommended types for the best taste and texture.
How do I prevent the jam from overflowing during baking?
Use about 1/3 cup of jam per batch. Avoid overfilling the indentation. Choose thicker jam and be careful not to add too much to prevent overflow.
More Exquisite recipes
melted snowman cookie dough bites  offer different flavor experiences for your dessert table, allowing you to adapt to various seasons and occasions while maintaining that wow factor that christmas is known for.
Follow Us for More Delicious Inspirations! 📌
Love this Pumpkin and Coconut Yule Roll and hungry for more creative recipes? Follow us on Pinterest for an endless stream of stunning dessert inspiration! We’re constantly sharing new recipes, baking tips, and seasonal creations that will make your table the talk of every gathering.


